To-do Lists
Introduction
New in Version 8 of RangerMSP is the To-do Lists system which has been integrated throughout the application, both on the desktop and the Web Interface.
You can now create a To-do List in Accounts, Employees, Tickets, Contracts, Assets and Opportunities. In each of those windows you will see a new tab for To-do Lists where you can add a list on the specific record, such as a Ticket. You can even add multiple lists to each Ticket, Contract or other record type. All your To-do Lists will appear on the To-do List tab and there is also a section on the Preview tab which will indicate the number of currently open To-dos.
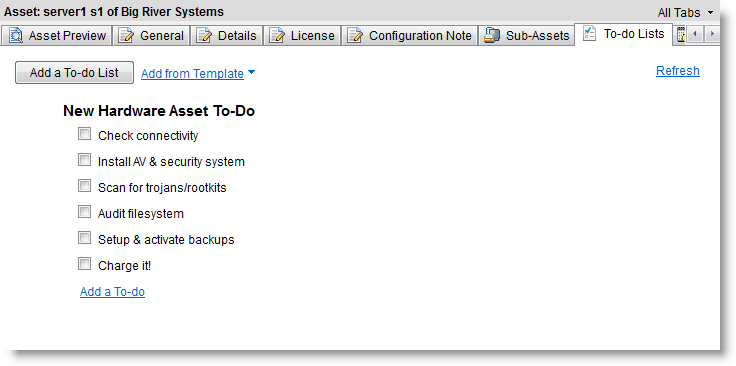
For example a list could contain a series of steps which should be performed on a new Asset, such as a server installation checklist which might say:
When using a pre-made template this list of steps can quickly be applied to every new Asset, Ticket, Account etc. Each section has its own separate selection of To-dos so sales staff could have their sales related lists to apply to new opportunities while technicians have their tailored lists for tech related tasks.
Creating a To-do List
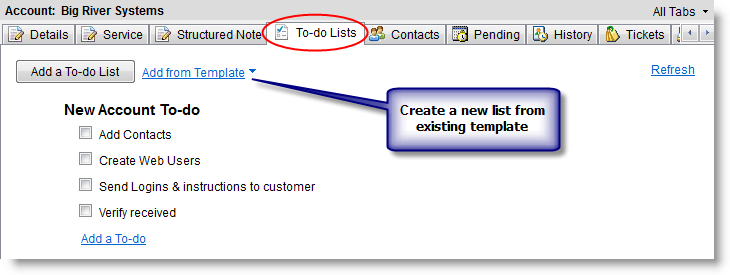
You can create a completely new To-do List or you can base it on a previously saved template. First go to the appropriate window (Tickets, Accounts etc) and select a record then go to the To-do Lists tab.
- Click Add a To-do List OR click Add from Template and select one from the drop down list (if you have any).
- Type in a title in place of the default “Enter the list title here”.
- Click the OK (Start adding To-dos) button.
- A checkbox will appear and next to it you should type in the actual item to be done and then click OK. The item is added and another checkbox appears below for you to add another item if required - if you do not wish to add more items then just click Cancel (Stop adding To-dos).
Your To-do list is now created.
To create a To-do List from a template, click Add from Template and select it from the list which appears. The entire To-do List will appear immediately, complete with all items (including any which were marked as done when the template was created) ready to be worked on.
Managing To-do Lists
Deleting a To-do List
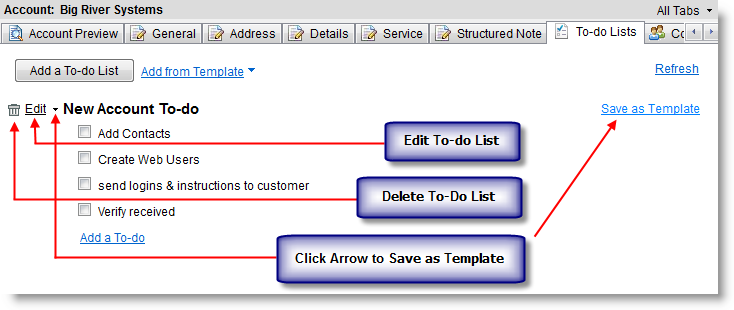
To delete an entire To-do list just point to the list title and the edit menu will appear to the left, then simply click the trashcan icon.
Editing a To-do List
To edit the list title just point to the list title and the edit menu will appear to the left, click Edit then you can update the title and click Save Changes when done.
Changing the Order of To-do Lists
You can easily change the order of Lists by dragging and dropping the list.
Saving a To-do List as a Template
To create a template from a To-list just point to the list title and the edit menu will appear to the left, click the small down-arrow and then click Save as Template. Give the template a name and click OK. Now the template is available to use from the Add from Template list.
Activity Templates
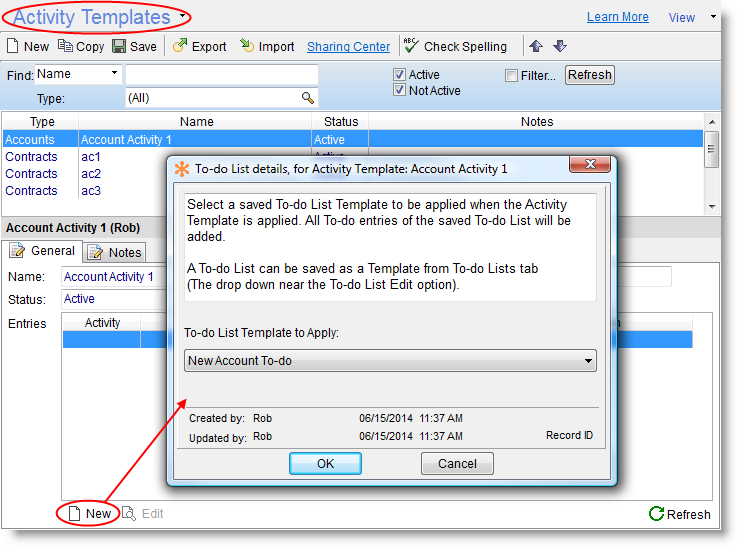
To-do lists can also be added to Activity Templates and then automatically created when the Activity Template is applied. To add a To-do List to an Activity Template you must first create a To-do List template as described above and then after creating the Activity Template in the usual way you click New > To-do List Entry and then select the To-do List template to use.
Working with a To-do List
Adding To-do items
You can add new items to an existing list at any time by clicking the Add a To-do link which appears just below the list.
Marking a To-do item as done
When an item is done, simply check the box on the left of it. The item will be moved to the list of completed items and can be seen by clicking the x done link (where x is the number of completed items). To then hide them again just click Hide done To-dos.
When an item is marked as done, the system also stores which employee did it and displays their name next to the item in the completed items list, so if multiple employees are working on the same list you can quickly see who did what.
Undoing a To-do item
To mark a completed item as not complete and add it back to the To-do list, click the x completed link to reveal all the completed items, then uncheck any you wish to undo.
Editing a To-do item
To edit a To-do list item, either double-click the item or point to it in the list and the edit menu will appear to the left, click Edit then you can update the text and click Save Changes when done.
Deleting a To-do item
To delete a To-do list item just point to the item in the list and the edit menu will appear to the left, then simply click the trashcan icon.
Changing the Order of To-do List Items
You can easily change the order of items in a list by dragging and dropping the item. Items can also be dragged between lists.
Adding a Charge for completed To-do items
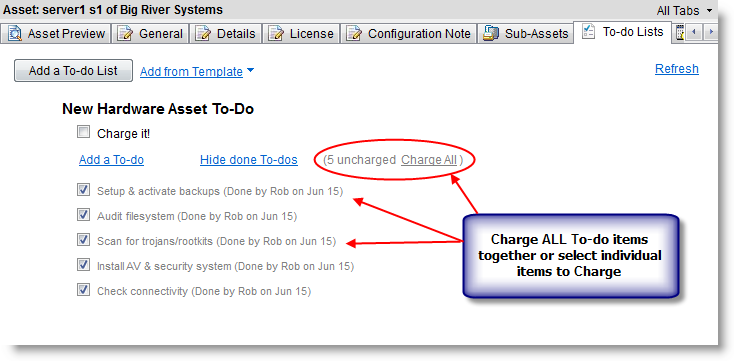
Once a To-do item is marked as completed you can easily add a Charge for the work done on it. Click the x done link to reveal the list of done items, then point to any item you want to add a Charge for and a menu appears to the left. Click Charge and the standard New Charge window pops up ready to be completed. The Charge description already contains the description copied from the To-do item.
Reports
There are new Reports which include the To-do Lists, such as "Asset Details Including Configuration Note, Pending, To-do and History" and "Expanded Ticket Details2" which can be generated from the Reports window in the usual way.
